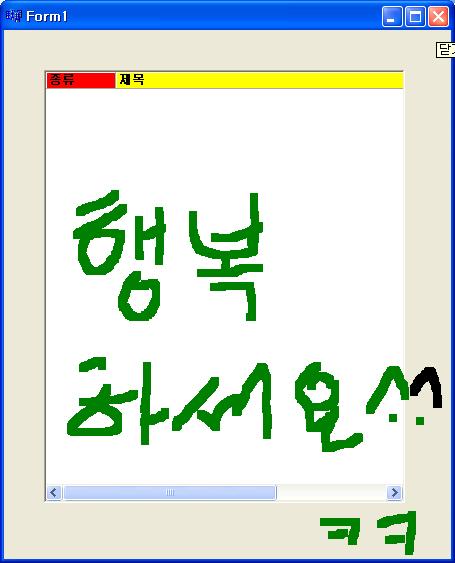
안녕하세요....ㅋㅋ 월천입니다.... 후덥지근 하군요... 짜증 많이 나지요... ㅋㅋㅋ
비오면 지하실 물 퍼내고... 해빛 나오면 덥고... 이것 뭐... ㅋㅋㅋㅋ 그래도...
즐겁게....좋은 생각만 합니다...뉴스도 잘 보지 않고... 나쁜 소식만 하도 전해서...
좋은 소식 감동적인 소식을 전하는 뉴스는 없나 ... ㅋㅋㅋ
LISTVIEW 같은 것 그냥 사용하다가... 이번에는 배경을 디자인을 입혀더니...
욕심이 나내요... ㅋㅋㅋ 그래서... ListView의 HEADER Column 색상을 바꾸어야겠다..
마음을 먹고... 또 인터넷을 뒤져습니다. 음... 이제 검색 하는 방법이 좀 늘었는지..
금방 나오내요... 그대로 따라하니... 몇 번의 Error가 발생하는 군요...
C++Builder가 나라마다 다른 것인지... 환경이 안잡혀 있어서 그런 것인지.. ㅋㅋㅋ
여하튼 이래 저래... 눈동냥하며... 짜찝기로... 수정해 보았습니다...
돌아가는 군요... 필요하시 분... 참고 해 주세요....
볼랜드포럼에 들어오시는 모든 분들께 행복한 일들만 많이 일어나길를 .... 바라며... 물러갑니다... 바바...
//제가 수정한 것입니다..... 잘못되거나 잘못 짜찝기 한 것이 있으면... 수정해 주시며 감사하게습니다... ㅋㅋㅋ
//How to change header column color in TListView
//H
#ifndef Unit1H
#define Unit1H
//---------------------------------------------------------------------------
#include <Classes.hpp>
#include <Controls.hpp>
#include <StdCtrls.hpp>
#include <Forms.hpp>
#include <ComCtrls.hpp>
//---------------------------------------------------------------------------
class TForm1 : public TForm
{
__published: // IDE-managed Components
TListView *ListView1;
private: // User declarations
//Controls::TWndMethod OldListViewWP; <-- 이게 원본 이렇게 하니.. 뭐... Error가 나군... 그래서 늘 하던대로...ㅋㅋㅋ 이렇게 되군..
Classes::TWndMethod OldListViewWP;
void __fastcall NewListViewWP(TMessage &Msg);
public: // User declarations
__fastcall TForm1(TComponent* Owner);
};
//---------------------------------------------------------------------------
extern PACKAGE TForm1 *Form1;
//---------------------------------------------------------------------------
#endif
//----------------------------------------------------------------------------------------------------------
//CPP
//---------------------------------------------------------------------------
#include <vcl.h>
#include <memory> // <- 이것 하나 추가하니 Error가 없어지는 군... ㅋㅋㅋ 그런면 되겠지.. ㅋㅋㅋ
#pragma hdrstop
#include "Unit1.h"
//---------------------------------------------------------------------------
#pragma package(smart_init)
#pragma resource "*.dfm"
TForm1 *Form1;
//---------------------------------------------------------------------------
__fastcall TForm1::TForm1(TComponent* Owner)
: TForm(Owner)
{
OldListViewWP = ListView1->WindowProc;
ListView1->WindowProc = NewListViewWP;
//늘 이렇게 하고 ::~ 에서 ....
//ListView1->WindowProc = OldListViewWP; 돌려 준 것 같은데... 냅두어도 이상이 없나? 늘 연구는 깊이 하지 않고 베겨쓰기
//바빠서... ㅋㅋㅋ.. 아니면 잊어버린것인지.. ㅋㅋㅋㅋ 누가 똑똑한 분이 설명해 주시길.... ㅋㅋㅋㅋ
}
//---------------------------------------------------------------------------
void __fastcall TForm1::NewListViewWP(TMessage &Msg)
{
if (Msg.Msg == WM_NOTIFY)
{
LPNMCUSTOMDRAW lpnmcd = (NMCUSTOMDRAW*)Msg.LParam;
// if the notification is a Custom Draw notification
// and from the header control
if (lpnmcd->hdr.code == NM_CUSTOMDRAW &&
lpnmcd->hdr.hwndFrom == GetDlgItem(ListView1->Handle, 0))
{
// check the drawing stage
switch (lpnmcd->dwDrawStage)
{
// prior to painting
case CDDS_PREPAINT:
{
// tell Windows we want individual
// notification of each item being drawn
Msg.Result = CDRF_NOTIFYITEMDRAW;
break;
}
// notification of each item being drawn
case CDDS_ITEMPREPAINT:
{
std::auto_ptr<TCanvas> HeaderCanvas(new TCanvas());
HeaderCanvas->Handle = lpnmcd->hdc;
HeaderCanvas->Font->Name = "Tahoma";
HeaderCanvas->Font->Style = TFontStyles() << fsBold;
TRect Rect = lpnmcd->rc;
int const Index = lpnmcd->dwItemSpec;
unsigned int const State = lpnmcd->uItemState;
if (Index == 0)
HeaderCanvas->Brush->Color = clBlue;
else if (Index == 1)
HeaderCanvas->Brush->Color = clRed;
else if (Index == 2)
HeaderCanvas->Brush->Color = clYellow;
// draw the header button
// Frame3D(HeaderCanvas, Rect, clBtnHighlight,
// clBtnShadow, 1); 이게 원본
if (State & CDIS_SELECTED)
{
Frame3D(HeaderCanvas.get(), Rect, clBtnShadow, //(TCanvas*)HeaderCanvas 요로케 해도 안되네.. ㅋㅋㅋ, 음 .get을 하니 되군... 도움말이 막강하군... ㅋㅋㅋ
clBtnHighlight, 1); //std::auto_ptr<TCanvas> 이게 뭔지... 확실히 모름.. 그냥 베껴 사용하는 중... ㅋㅋㅋ
//잘 아시는 분 나를 무지에서 나오게 해주세요... ㅋㅋㅋ
}
else
{
Frame3D(HeaderCanvas.get(), Rect, clBtnHighlight,
clBtnShadow, 1);
}
// draw the text
HeaderCanvas->FillRect(Rect);
HeaderCanvas->TextRect( //글자를 가운데 가려면 ... 코드를 좀 더 추가해야 겠군요... ㅋㅋㅋ 에고 내 것도 해야겠군.... ㅋㅋㅋㅋ
Rect, Rect.Left + 2, Rect.Top,
ListView1->Columns->Items[Index]->Caption
);
HeaderCanvas->Handle = 0;
// tell Windows the item has already been drawn
Msg.Result = CDRF_SKIPDEFAULT;
break;
}
}
return;
}
}
// pass on the messages
OldListViewWP(Msg);
}
//--------------------------------------------------------------------------------------------------------
//아래는 원본.....
출처:
http://bcbjournal.org/bcbcaq/?loc=views&caq=21
//--------------------------------------------------------------------------------------------------------
DESCRIPTION: Adding small glyphs to a list view's header control is common practice in many applications. This is easily accomplished and outlined in the CAQ: Adding Bitmaps to a list view's Header Control. However, perhaps you'd like to change the background color of the header, or draw a bitmap transparently in a certain header section. In this case, the solution is to use the Custom Draw service. As mentioned in the CAQ: An Introduction to Custom Draw, this requires comctl32 version 4.70+ (IE 3).
Recall that Custom Draw is nothing more than a fancy communication between you and Windows. Windows sends you messages that drawing is about to begin (CDDS_PREPAINT). You respond by telling Windows what drawing stages you want notification of, in this case CDRF_NOTIFYITEMDRAW for each header section. Windows then responds by sending you messages corresponding to each header section being drawn (CDDS_ITEMPREPAINT). Finally, you draw the header section, then respond to Windows by telling it that you drew the header (CDRF_SKIPDEFAULT), so that it doesn't draw the header again.
While BCB4+ encapsulates the Custom Draw service for TListView and TTreeView controls, it does not do so for header controls. In fact, it is probably a good idea to learn Custom Draw the API way, as there are other common controls that allow the service for which the VCL provides no Custom Draw encapsulation. The ToolBar and TrackBar controls are some examples of this.
Since Custom Draw messages are sent to the parent of the control, and the header control is a child of the ListView, you'll need to subclass the ListView and handle the WM_NOTIFY message in the subclass procedure. This is easily accomplished via the WindowProc property. In the subclass procedure, handle the WM_NOTIFY message and test the code member of the NMHDR member of the NMCUSTOMDRAWstructure (sent as the LParam) for the NM_CUSTOMDRAW notification. Also, test the hwndFrom member of the NMHDR to make sure the notification corresponds to the header control. From there, simply test the drawing stage and respond with the correct CDRF_* constant (response flag). The following list describes the information conveyed in each member of the NMCUSTOMDRAW structure:
typedef struct tagNMCUSTOMDRAWINFO
{
NMHDR hdr; <--- This the the NMHDR structure that describes the sender
of the message and the actual type of notification
(we're looking for NM_CUSTONDRAW in this case).
DWORD dwDrawStage; <---This member reports the drawing stage of the
Custom Draw process (CDDS_*).
HDC hdc; <---This member is a handle to the device context to draw on.
RECT rc; <---This member is the rectangle of the particular header
section referred to by the dwItemSpec member.
DWORD dwItemSpec; <---This member reports the zero-based index of the
current header section that is being drawn.
UINT uItemState; <---This member reports the state of the item
(e.g., pushed, hot, focused, etc.). It can be
a combination of one or more of the CDIS_*
constants.
LPARAM lItemlParam; <---extra information associated with each item
} NMCUSTOMDRAW, FAR * LPNMCUSTOMDRAW;
The code below demonstrates how to use the Custom Draw service with a TListView object's header control. If you've read the other Custom Draw articles, you've probably notice that all the techniques are strikingly similar. This is one of the advantages of Custom Draw. Namely, the implementation has little dependence on the particular common control begin drawn. This of course does not hold for the actual drawing routine, however, the idea of drawing stages and responses is indeed common. Another important thing to note is that I used a TCanvas in the above implementation. This is generally not recommended for Custom Draw and/or owner-drawn controls. In some situations using a TCanvas will render all items in bold and a different size/font (buggy TCanvas). If possible, use the handle to the device context and GDI drawing routines directly.
KEYWORDS: WM_NOTIFY, Custom Draw
// in header...
private: // of TForm1 class
// since Custom Draw messages are sent to the
// parent of the control, you'll need to
// subclass the ListView...
Controls::TWndMethod OldListViewWP;
void __fastcall NewListViewWP(TMessage &Msg);
//---------------------------------------------------------------------------
__fastcall TForm1::TForm1(TComponent* Owner)
: TForm(Owner)
{
OldListViewWP = ListView1->WindowProc;
ListView1->WindowProc = NewListViewWP;
}
//---------------------------------------------------------------------------
void __fastcall TForm1::NewListViewWP(TMessage &Msg)
{
if (Msg.Msg == WM_NOTIFY)
{
LPNMCUSTOMDRAW lpnmcd = (NMCUSTOMDRAW*)Msg.LParam;
// if the notification is a Custom Draw notification
// and from the header control
if (lpnmcd->hdr.code == NM_CUSTOMDRAW &&
lpnmcd->hdr.hwndFrom == GetDlgItem(ListView1->Handle, 0))
{
// check the drawing stage
switch (lpnmcd->dwDrawStage)
{
// prior to painting
case CDDS_PREPAINT:
{
// tell Windows we want individual
// notification of each item being drawn
Msg.Result = CDRF_NOTIFYITEMDRAW;
break;
}
// notification of each item being drawn
case CDDS_ITEMPREPAINT:
{
std::auto_ptr<TCanvas> HeaderCanvas(new TCanvas());
HeaderCanvas->Handle = lpnmcd->hdc;
HeaderCanvas->Font->Name = "Tahoma";
HeaderCanvas->Font->Style = TFontStyles() << fsBold;
TRect Rect = lpnmcd->rc;
int const Index = lpnmcd->dwItemSpec;
unsigned int const State = lpnmcd->uItemState;
if (Index == 0)
HeaderCanvas->Brush->Color = clBlue;
else if (Index == 1)
HeaderCanvas->Brush->Color = clRed;
else if (Index == 2)
HeaderCanvas->Brush->Color = clYellow;
// draw the header button
if (State & CDIS_SELECTED)
{
Frame3D(HeaderCanvas, Rect, clBtnShadow,
clBtnHighlight, 2);
}
else
{
Frame3D(HeaderCanvas, Rect, clBtnHighlight,
clBtnShadow, 2);
}
// draw the text
HeaderCanvas->FillRect(Rect);
HeaderCanvas->TextRect(
Rect, Rect.Left + 2, Rect.Top,
ListView1->Columns->Items[Index]->Caption
);
HeaderCanvas->Handle = 0;
// tell Windows the item has already been drawn
Msg.Result = CDRF_SKIPDEFAULT;
break;
}
}
return;
}
}
// pass on the messages
OldListViewWP(Msg);
}
//---------------------------------------------------------------------------


